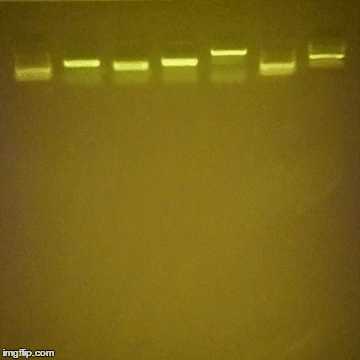
Gel Electrophoresis is a method to spatially separate DNA, proteins or macromolecules in general by their weight (or charge). Depending on your field of research you’ve either never heard of this, or they are ubiquitously referred to as “gels” and they are a part of your daily life.
The authors of this blog work in a gel-philic field.
This Technical Tuesday we are talking about making this process less draining on your finances, whether you are running one or one-thousand gels.
DNA Gels
Gels run to separate DNA are usually agarose gels (0.7-2%). Commercially available pre-cast gels run $10-$20 each. In contrast you can buy enough reagents to make 300 gels for ~$800–which bumps the cost down to around $2.50/gel. These agarose gels are easy to pour because the agarose polymerization is a temperature based transition.
You will also need a running buffer (TAE or TBE). A 50X stock solution of TAE will cost between $50-100. You can make the buffers yourself without too much effort, and if you are really committed to saving, some folks say that you can reuse them.
Note that Ethidium Bromide (the most commonly used stain in DNA agarose gels) is perhaps not as dangerous as the signs in your lab make it out to be. There is very little reason to splurge for the more expensive “non-mutagenic” stains.
If your lab is running dozens of gels (or more) each week, you should pour your own–addgene has a good tutorial which any undergraduate could follow. If you anticipate only running a few gels in your career, it might be cheaper to buy things pre-packaged because the bulk reagents are a hefty upfront cost.
Protein Gels
Similar to DNA gels, it is always cheaper to pour your own gels for protein electrophoresis–pre-packaged gels still run ~$10 a pop . To figure out what kind of gel you need to use we recommend this resource from Thermo Fisher. Sometimes you can get away with agarose gels for very heavy proteins, but usually protein gels are polyacrylamide.
Polyacrylamide gels are harder to pour than agarose gels because the polymerization is chemical rather than physical. Plus, acrylamide is a known neurotoxin so safety is a concern. There are lots of resources out there that describe how to pour your own. Our favorite was proposed by Alexander Hwang, Paris Grey, Katrina Cuddy and David Oppenheimer in this paper.
They’ve given a detailed description of how to retrofit Invitrogen Nupage Novex minigel cassettes for reuse with little more than epoxy. The paper even includes this video instructional:
Gel Boxes
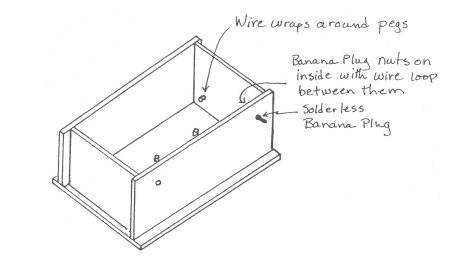
No matter how you are making your gels, even if it’s just two glass plates, some packing tape, a few binder clips, a HDPE comb and your polymer, your going to need a Gel Electrophoresis Chamber. At $500 these don’t cost much, but then again they are just plastic boxes. So why not make your own?

If you want something a little more compact, here’s a tutorial complete with videos on how to make a smaller gel electrophoresis system.

Power Supplies
If you want to run your gels, you are going to need a power supply to apply a voltage difference across the gel. Go through this quick instructional on how to build your own power supply to make a compact and beautiful little power supply.

Imaging
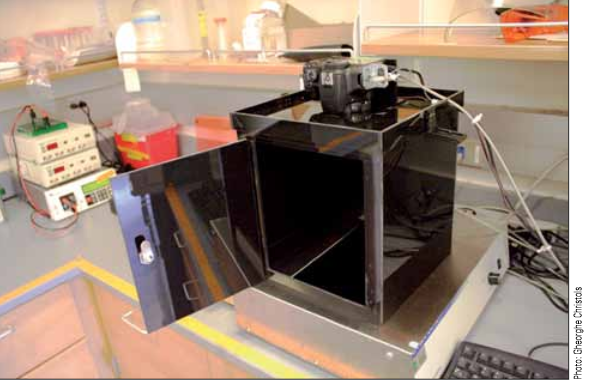
So you can get really expensive and fancy machines to take pictures of your gels. If you are not too picky about image quality, you can use your smart phone and some good lighting to get decent pictures. Looking for higher quality photos? You can build your own gel imaging box with a nice digital camera for less than $1000. And even the commercially available boxes are getting cheaper; here’s the imaging box (without the camera) that one of our contributors uses that cost them just $275. Although it does seem like you are just paying for a box with a light at the bottom. And finally here’s a great guide to help you figure out what kind of system to get to fit your needs.
Don’t want to do it yourself but still want to keep the cost reasonable?
Minipcr sells a Electrophoresis Chamber complete with power supply and built-in blue light transilluminator for just $350. The box is translucent so you can take pictures of your gel with a phone as it runs.
Thanks to Dr. John Berezney for pointing out the resources on DIY gel boxes.
Thanks to James Sheehy for some of the information in this post.